 Features / Collaboration
Planner
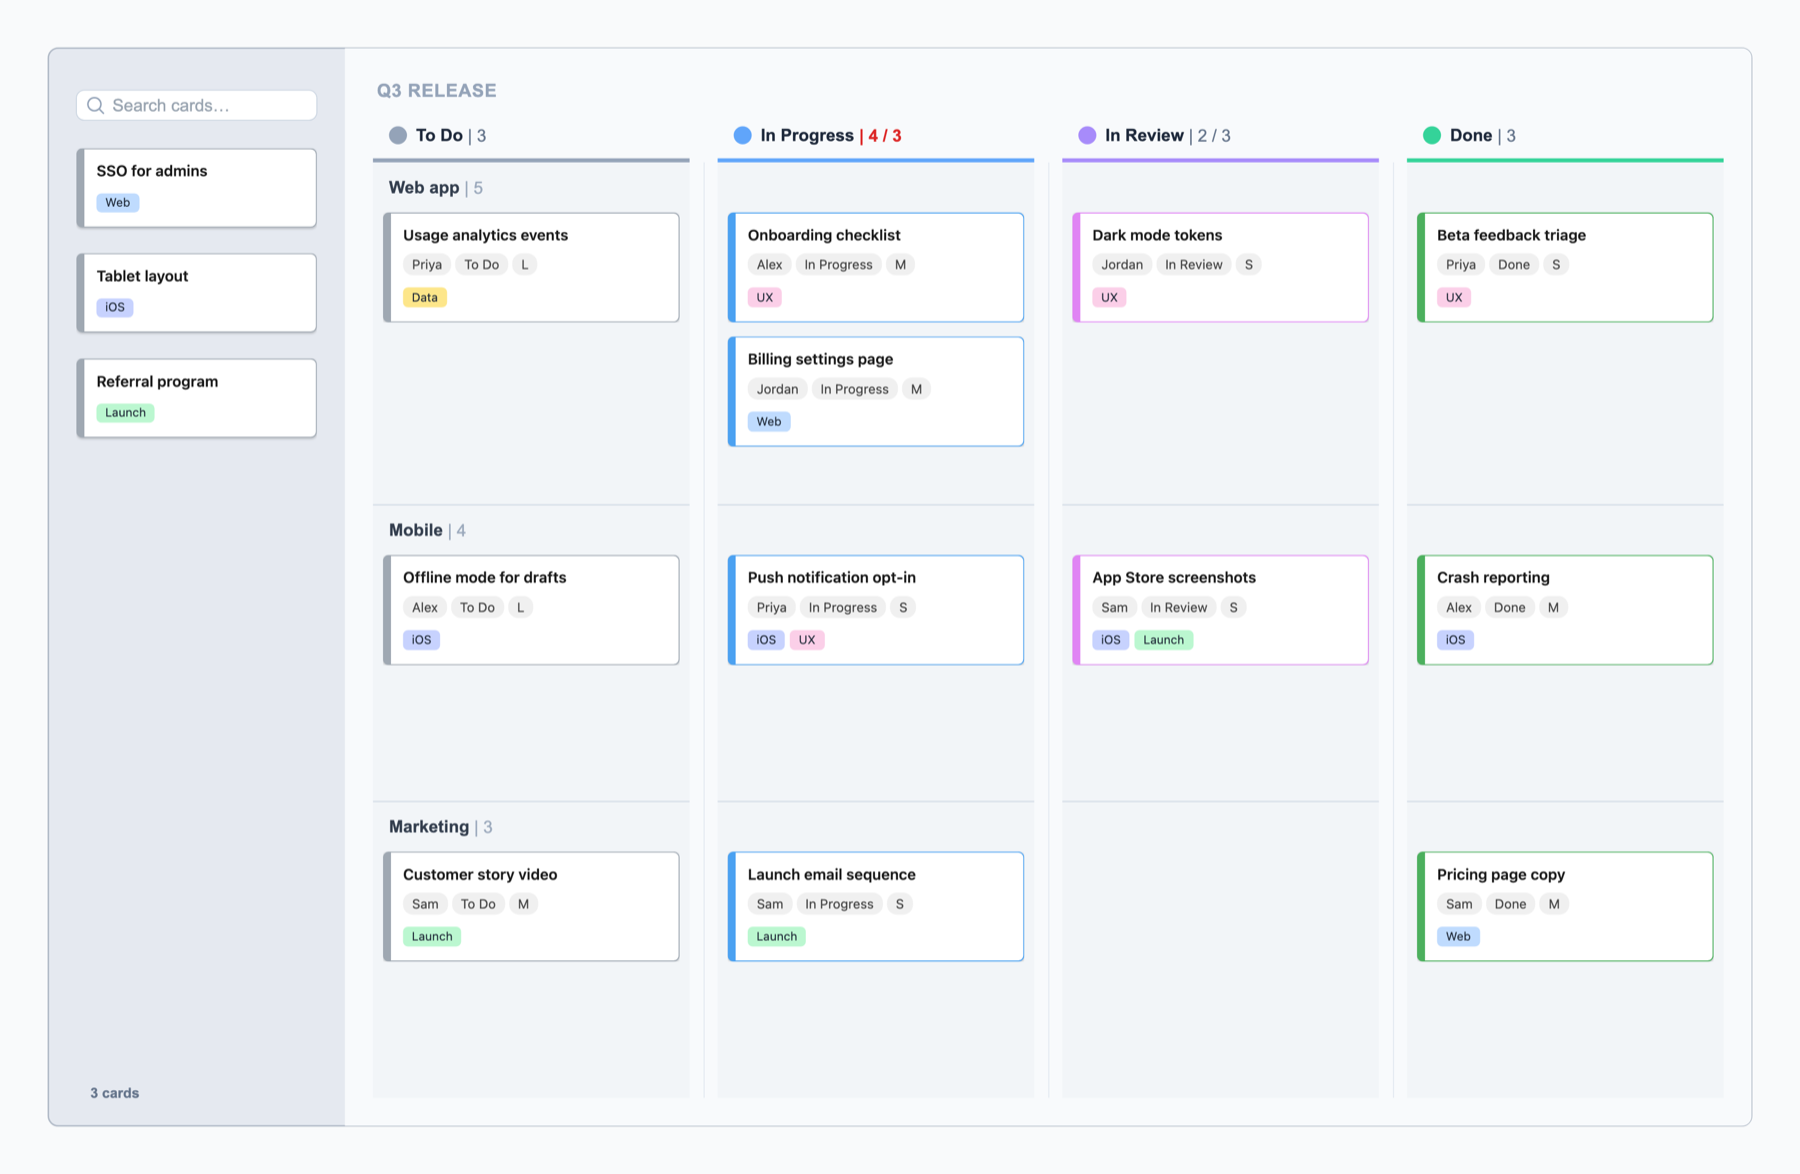
The Planner is a workshop-style kanban you drop right onto the canvas: a pinned Backlog on the left for intake, a row of custom columns (Now / Next / Later, MoSCoW, RICE, Kanban, or your own) for sorting work, and optional swimlanes across them for teams, workstreams or priorities.
Add a Planner
Section titled “Add a Planner”Add the Planner tool to your toolbar from the + tool picker, then click it and click the canvas to drop one where you want it. A new planner starts empty and shows a layout picker, so you can choose a starting structure (Now · Next · Later, NNL + KPIs, MoSCoW, Kanban, RICE, or Blank). You can rename, recolor, reorder, add, and remove columns afterward. Click the title at the top of the planner to rename the board itself.
Backlog intake
Section titled “Backlog intake”Every planner has a pinned Backlog on the left where new work lands. It packs cards into evenly-sized lanes automatically and grows new lanes as you add more. Use the search box to filter cards across the board, and the import buttons to pull work in. Cards you import show a New badge until you move or open them, so fresh intake is easy to spot.
Don’t need it? Hide backlog in the planner toolbar puts it away without touching its cards, and Show backlog brings it back.
Columns and cards
Section titled “Columns and cards”- Add a card to the bottom of any column with its + Add a card button, then type the title inline.
- Drag cards between columns and the backlog; they snap into place and re-stack.
- Drop a sticky note onto a column and it becomes a card, right where you dropped it.
- Open a card for its description, status, assignee, estimate and dates. Open in side panel keeps it docked while you work on the board. See Card.
- Move a column’s cards back to the backlog with the column’s reset button, or delete a column (its cards return to the backlog, so nothing is lost).
- Column headers follow you. On a long planner, once the header row scrolls off the top of the screen, each column’s name and card count stay pinned at the top, lined up with the column.
Swimlanes
Section titled “Swimlanes”Swimlanes split the columns into rows, so one planner can hold several teams, workstreams or priority levels side by side. Each lane shows its name and card count; the Backlog stays one full-height intake on the left.
- Add a lane with + Add swimlane under the planner. Rename, recolor, reorder (drag), resize or delete a lane from its header.
- Cards land in the lane under the pointer, whether you drag one in, use + Add a card, or drop a sticky note.
- Hide swimlanes from the planner toolbar to see plain columns again. Every card keeps its lane, so showing them again puts everything back.
- The Swimlanes section in the planner’s Settings sets the lane color wash, whether it tints the card area, and the label position and color.
Filter cards
Section titled “Filter cards”Filter cards in the planner toolbar narrows the planner to the cards you care about: pick from the assignees, statuses and tags the cards carry, each listed with its count. Choosing several values in one group matches any of them; choosing across groups matches cards that have all of them.
Cards that don’t match fade instead of moving, so the layout stays put. Column, lane and backlog counts read matched / total while a filter is on. The filter is yours alone: it isn’t saved to the board, and nobody else’s view changes.
WIP limits
Section titled “WIP limits”Give a column a work-in-progress limit from the gauge button in its header (hover to see it). The count then reads current / limit, for example 4 / 3, and turns red once the column is over, including in the pinned header when you scroll. The limit counts the whole column across every swimlane. Clear the field to remove it.
A limit is a signal, not a lock: you can still drop cards into a full column, and the red count makes the overload visible to everyone on the board. The Backlog never has a limit.
Apply colored tags to cards from the context toolbar’s tag menu: create a tag (name and color), then click to apply it to the selected cards. Tags are shared across the board, so you can reuse them on any card, and you can filter by them.
Export
Section titled “Export”Right-click a planner and choose Export as > CSV or Export as > Google Sheets. You get one row per card, in board order: column, swimlane, card title, description, status, assignee, estimate, start and end dates, and tags. Empty columns still get a row, so the structure comes through.
Import from Azure DevOps
Section titled “Import from Azure DevOps”Pull work items straight into the backlog from the Backlog header’s import buttons. Paste a list, or import from Azure DevOps by iteration, shared query, assigned-to-me, or custom WIQL, with a work-item-type filter (PBI, Feature, Bug, and more). Already-imported items are skipped so you won’t get duplicates.
Build a planner with Claude or ChatGPT
Section titled “Build a planner with Claude or ChatGPT”With Bizby in Claude or Bizby in ChatGPT connected, ask for a planner in plain language and it arrives as a real one: columns, swimlanes, cards with their assignee, status, estimate and tags, and card colors. It can add a planner to a board you already have, and read one back to summarize where the work stands.
Moving off another tool? A screenshot of a kanban in Miro, Trello or Jira is enough to rebuild it as a Bizby planner. See Move a Miro kanban into a Bizby planner.
Bizby AI in the Planner
Section titled “Bizby AI in the Planner”Select a planner and open the Bizby AI menu in the context toolbar for two planner-specific actions.
Draft a plan
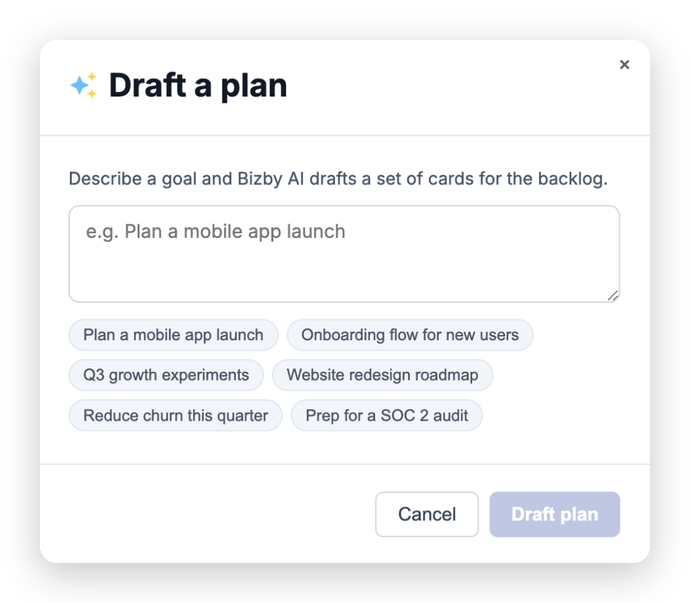
Section titled “Draft a plan”Describe a goal (for example, “Plan a mobile app launch”) and Bizby AI drafts a set of starter cards straight into your backlog, so you can go from a blank planner to a working board in one step. It reads the cards already on the board so it doesn’t repeat work you’ve captured.
Summarize planner
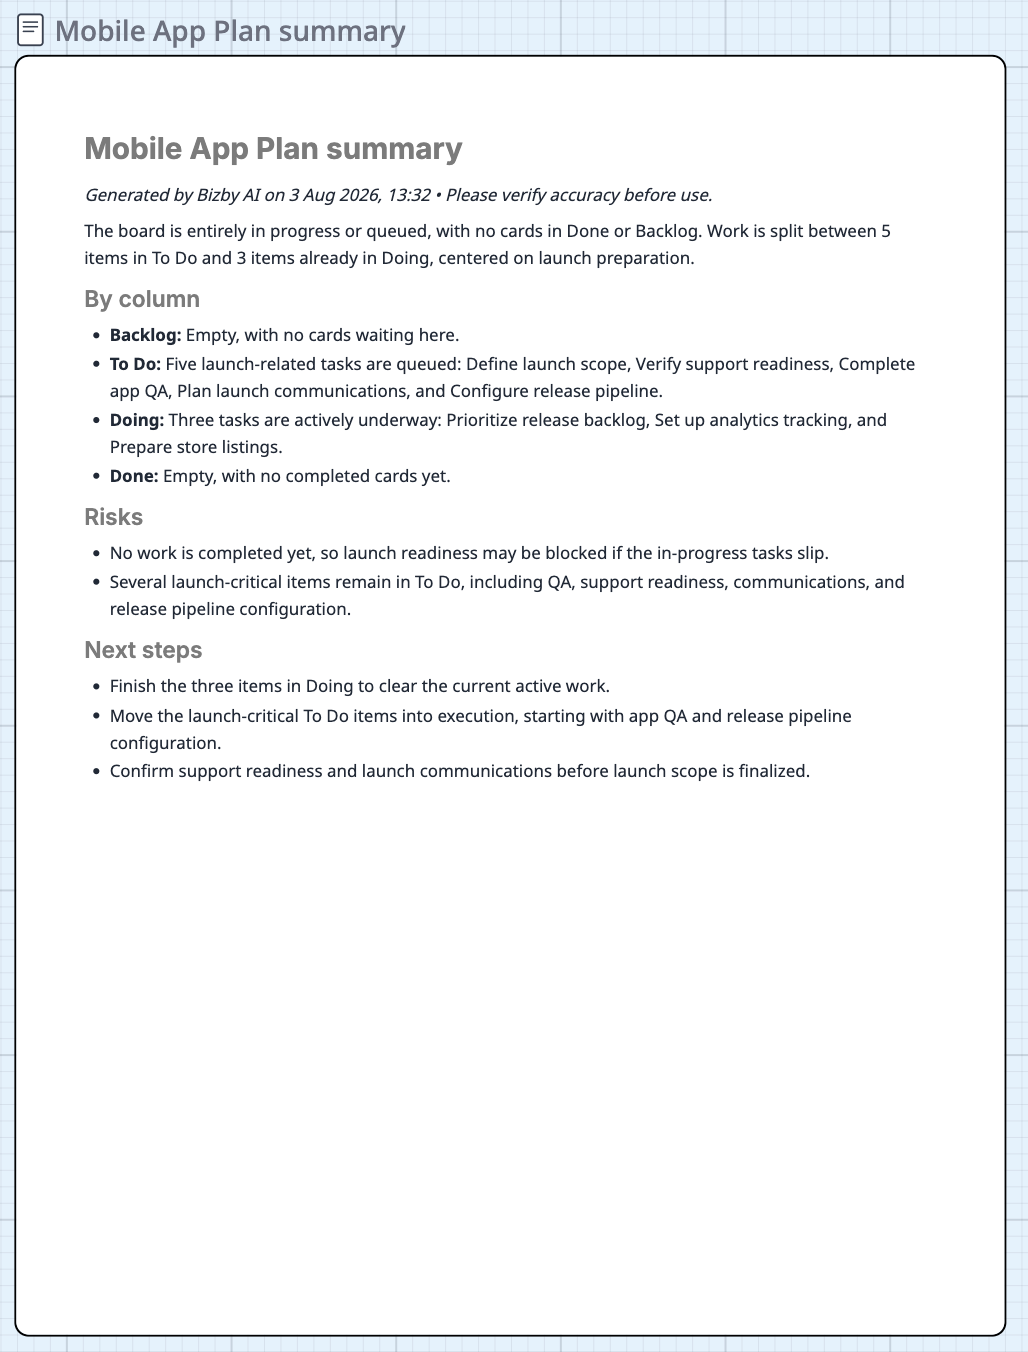
Section titled “Summarize planner”Turn the current state of a planner into an editable document beside it, with a short overview, a per-column status list, and any risks and next steps. It sees each card’s swimlane too. It’s built for standups and stakeholder updates, and because the result is a Bizby document you can edit and format it, then keep it on the board.
Settings
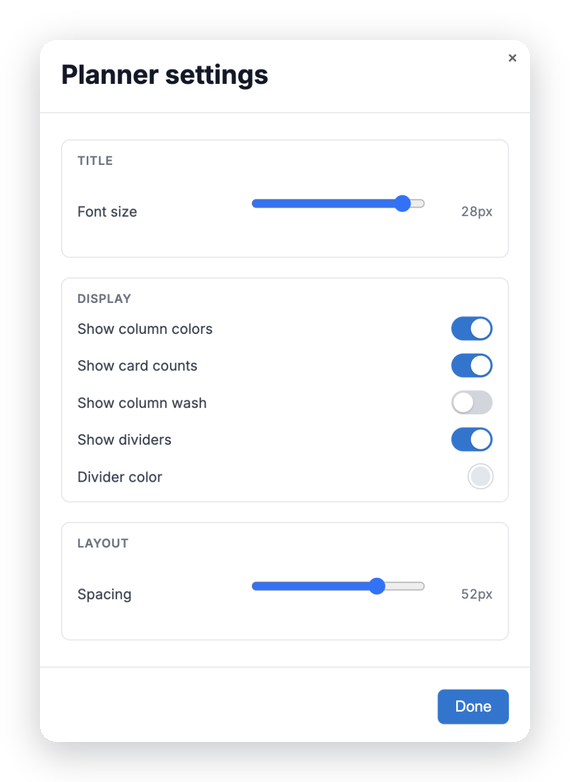
Section titled “Settings”Open Settings from the planner context toolbar to adjust spacing, the title font size, column colors, card counts, dividers, the column wash, and swimlanes. The wash can be a single shared color or each column’s own color.
Use Cases
Section titled “Use Cases”- Backlog grooming - Triage incoming work into Now / Next / Later
- Sprint and release planning - Sort scope with MoSCoW or RICE
- Team boards by workstream - One planner, a swimlane per team or product area
- Flow control - WIP limits show where work is piling up
- Roadmapping workshops - Prioritize features live with the team
- Azure DevOps planning - Import work items and sort them on the canvas
- Kickstart a plan - Draft a plan from a goal, or have Claude or ChatGPT build it
- Status updates - Summarize the board into a document, or export it to a spreadsheet